Some how over the years I've ended up with 12 blogs and I'm having a hard time keeping up with all of them. In July 2011 I started a new business called Raise Me Strong. After some success on Facebook I decided to start another blog, this one for the business. I've decided to scrap all my other blogs for now and just keep up with my Raise Me Strong one. If you enjoyed my Pizza Pi blog I think your might like the one for Raise Me Strong too. It has a lot of similar posts. If you have a chance you should check it out.
Thanks for your support.
Tuesday, August 23, 2011
Tuesday, April 13, 2010
Pinwheel Cookies
Pinwheel Cookies
½ cup shortening
⅓ cup plus 1 tbsp butter softened
2 egg yolks
½ teaspoon vanilla
1 Package of marble cake mix
1 Package of marble cake mix
1. Combine shortening, ⅓ cup butter, egg yolks and vanilla in large bowl. Mix until well blended.
2. Set cocoa packet aside. Gradually add cake mix to blended ingredients and mix well.
3. Divide dough in half. Add cocoa packet and remaining 1 tbsp butter to half the dough and kneed until well blended and chocolate colored.
4. Roll out yellow dough between two pieces of waxed paper into a 18 x 12 x ⅛ inch rectangle. Repeat for Chocolate dough.
5. Remove top pieces of waxed paper from chocolate and yellow dough. Lay yellow dough directly on top of chocolate. Remove top waxed paper and roll up jelly roll fashion, beginning at wide side.
6. Refrigerate dough 2 hours.
7. Preheat oven to 350˚F. Grease cookie sheets. Cut dough into thin slices and place 1 inch apart on cookie sheet.
8. Bake 9-11 minutes or until light brown. Let cool 5 minutes on cookie sheet than move to cookie rack.
Note: I didn't refrigerate my dough. As you can see from the pictures my dough was soft and didn't hold the circle shape very well. But they still tasted good.


Monday, March 29, 2010
Chocolate Birds Nest
Chocolate Birds Nest
Chow Mein Noodles
Chocolate Chips
Jelly Beans
Wax Paper
1. Melt chocolate in the microwave. Watch carefully so you don't burn it.
2. Gently mix the melted chocolate with the Chow Mein Noodles.
3. Put handfuls of the chocolate noodle mixture on the wax paper and make a shallow dip in the pile with your finger.
4. Put a few jelly beans in the center of each pile.
5. Let sit for 30 minutes or until the chocolate had hardened.
6. Eat


Thursday, March 25, 2010
Painting a Bird House
Painting a Bird House
Bird House
Paint Brushes
Pencil
Acrylic Paint
Newspaper
Permanent Marker
K made a bird house in Cub Scouts and needed to paint it to have it signed off. This was a fun project.
1. Paint the house the color you want it. We used yellow and applied 4 coats over 2 days.
2. When the last coat has dried use a #2 pencil to sketch your design.
3. Trace over the lines you want black with the permanent marker.
4. Paint in the design with colored paints.


Tuesday, March 16, 2010
Easy Fudge Brownies
Easy Fudge Brownies
4 bars (1 oz. each) Hershey's Unsweetened Chocolate for baking
3/4 cup butter (1 ½ sticks)
2 cups sugar
3 eggs
1 ½ teaspoon vanilla extract
1 cup flour
1 cup chopped nuts (optional)
½ bag mini marshmallows
3 eggs
1 ½ teaspoon vanilla extract
1 cup flour
1 cup chopped nuts (optional)
½ bag mini marshmallows
1. Heat oven to 350 °F. Grease 9x13 baking pan.
2. Break chocolate bars into pieces.
3. Put Chocolate and butter in a large microwave-safe bowl. Heat on high 1-2 minutes or until chocolate is melted. Stir mixture till smooth.
4. Add sugar, stir until smooth.
5. Add eggs and vanilla. Mix well.
6. Add flour (and nuts, if desired). Stir till well blended.
7. Spread in pan and bake 30-35 minutes or until a toothpick poked into the center comes out almost clean.
8. Sprinkle marshmallows on top and bake 3-7 minutes. Check often so you don't burn them.
9. Let cool completely, than enjoy!!


7. Spread in pan and bake 30-35 minutes or until a toothpick poked into the center comes out almost clean.
8. Sprinkle marshmallows on top and bake 3-7 minutes. Check often so you don't burn them.
9. Let cool completely, than enjoy!!


Sunday, March 14, 2010
Happy Pi Day
Happy Pi Day
No, I didn't mean pie day. I have slightly better proof reading skills than that. I did indeed mean pi. Let me tell you a little about pi before telling you how we celebrated the day honoring it. Pi (or π ) is a mathematical constant whose value is the ratio of any circle's circumference to its diameter. Pi is equal to 3.14159........The digits in the decimal place in pi never end. Computers have been able to figure over a million digits thus far.
Here is an example of pi at work. Say you need a table skirt for your round table and all you have with you is a ruler. Don't panic......... Pi's to the rescue.
1. Measure the diameter of the table.

2. Let's pretend you came up with the number 20. Now you would times that number by π to find the circumference of your table.
d x π = c
20 x 3.14 = 62.8
3. You now know the circumference of your table (62.8 inches) and can therefore pick out an appropriately sized table skirt. ( So don't get one that's 58 inches because it won't fit all the way around and stay away from one that's 86 inches unless you plan on cutting it to fit. )
Now on to what we did to celebrate pi day (March 14th, or 3/14) this year.
The day started off with pi shaped pancakes.

Than we changed our computer wall paper to be more pi like.

We decided to see where our birthdays fell in pi. You should do yours too, it's kind of fun. Here is the website we used or you can just search in Google for "birthday in pi". Use the numbers of your birthday minus the first two digits of the year. So if your birthday was March 16, 1966 you would use the following, 31666. To keep with this example 31666 occurs at position 5,401 in pi (not including the 3.) Here is how we ranked......
E (myself) ~ position 12,614
M (my mom) ~ position 187,622
P (my dad) ~ position 115,405
K (my oldest son) ~ position 135,473
D (my youngest son) ~ position 44,572
Than we spent some time writing pikus. (Similar to haiku) Want to write your own? Here are the basic rules:
1. Your poem must have 3 lines
2. Line one must have 3 syllables
3. Line 2 must have 1 syllable
4. Line 3 must have 4 syllables.
Now you have a Piku. The syllables in the lines are as follows, 3.14. Here are some we wrote. I'll list the author in parentheses before the poem.
(E)
When hungry
I
Eat apple pie
(M)
Baby hats.
I
sew baby hats!
(K)
I saw a
hat
who ate a bat
(D)
I'm Dante
and
I eat chocolate
(P)
Balloon fight.
Run!
Not that way, fool.
P wrote some more wonderful ones that he posted on his website. If you have time you should check them out.
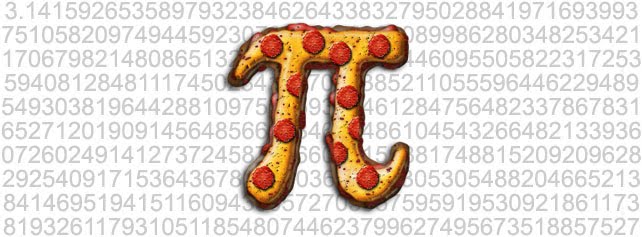
By then we were getting hungry so we made pizza pi. Literally.

Sugar cookies also are a nice treat, so we made some of those too.

Than what would Pi day be with out listening to the Pi song? Or even several pi songs. Here are the two we chose to listen to.
Video 1
Video 2
Both videos open in Youtube. Enjoy!
Video 1
Video 2
Both videos open in Youtube. Enjoy!
That concluded our Pi Day!! We sure had fun.
Saturday, March 13, 2010
Origami Angelfish
Origami Angelfish
Origami paper
Directions
Pen
We had a lot of fun making origami today. We made a dog, a cup and an angelfish. The angelfish was the hardest to make but we had a lot of fun with it.


Pen
We had a lot of fun making origami today. We made a dog, a cup and an angelfish. The angelfish was the hardest to make but we had a lot of fun with it.


Wednesday, March 10, 2010
Sugar Cookies
Sugar Cookies
Betty Crocker Sugar Cookie Mix
1 egg
1 Tablespoon flour
1/3 cup butter
Cookie Cutters
Sprinkles
1/3 cup butter
Cookie Cutters
Sprinkles
1. Mix cookies as directed on package for Cutout cookies.
2. Roll dough on floured surface until ¼ inch thick.
3. Cut out with cookie cutters and place on ungreased cookie sheet.
4. Decorate with sprinkles if desired.
5. Bake until edges are light brown.
6. Eat and enjoy once cool.


Tuesday, March 9, 2010
Treasure Maps
Treasure Maps
White printer paper cut in ½
Pen or Marker
Tea or Coffee
Cake pan
Hot water
Hot water
1. Pour about an inch of boiling water into a cake pan
2. Seep tea bags in water or dissolve coffee grounds in water until the water is dark brown or black.
3. While waiting for the water to cool off, rip the edges of the paper on all four sides.
4. Soak the paper in the cake pan for at least one hour.
5. Remove paper from the water and let dry.
6. Using pens or markers draw your very own treasure map.
Tip: I soaked our paper twice. The first time in herbal tea, which didn't make it dark enough brown. Than in Postum which did the trick. You may want to try black tea or coffee.


Monday, March 8, 2010
Marbleized Paper
Marbleized Paper
Shaving cream
Toothpicks
Tin foil
Paper cut to desired size
A squeegee or butter knife
Food coloring or paint
1. Spread a ¼ to ½ inch layer of shaving cream on the tin foil about the size of the paper you're using.
2. Put several drops of food coloring on the shaving cream.
3. Use the toothpick to created different designs with the food coloring.
4. Place the paper on the shaving cream and press down gently.
5. Starting at the corner lift the paper and set it shaving cream side up on a covered surface. (Tin foil or paper towel.)
6. Use the back end of the knife or the squeegee to remove all the shaving cream from the paper.
Tip: Use odorless shaving cream if you can find any. (Or do this project outside.) We didn't and it stunk up the house. Lesson learned.


Saturday, March 6, 2010
Oreo Dirt Cups
OREO DIRT CUPS
2 cups of cold milk
1 package (4-serving size) Jell-O chocolate flavor instant pudding
1 tub (8oz) Cool Whip topping, thawed
18 Oreo chocolate sandwich cookies, finely crushed, divided
8 plastic cups (6-7 oz)
8-16 gummy worms
8-16 gummy frogs or bugs (optional)
1. Prepare instant chocolate as directed on package. Let stand for five minutes.
2.Gently stir 1/2 cup of cool whip into the bowl of pudding. Sprinkle onetablespoon of Oreo crumbs into bottom of plastic cups. Top each with chocolate pudding. Sprinkle evenly with remaining Oreo crumbs. Refrigerate at least one hour.
3. Insert 1-2 gummy worms and 1-2 gummy frogs into each cup just before serving.
Makes 8 Sand & Dirt Cups. Enjoy!
We had almost as much fun making these as we did eating them.


We had almost as much fun making these as we did eating them.


Subscribe to:
Posts (Atom)